One of SharePoint’s greatest strengths is its ability to pull user data from easily customizable forms, organize it into columned lists, and put it to work in multiple templates and databases. Unfortunately, many online guides describe the form setup process in developer jargon or suggest you use the SharePoint Designer application. If you’re more code-savvy than I am, these resources may be a passable option, but for someone just starting out as a SharePoint administrator or just wants to help increase the productivity this blog post is for you. We’ll walk through the form creation process straight from your SharePoint site — creating a list, editing the entry form, and exporting the data to an Excel Spreadsheet to be used for analysis or other business processes.
Note: The following screenshots were taken from my Demo Site (previously featured in the “What Are SharePoint Templates and How Do You Use Them?” blog post), using Internet Explorer as my browser of choice because certain SharePoint features are only available using certain browsers (namely the export to Excel option, in this scenario).
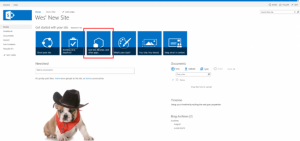
To start out, go to the page of your site where you want to collect your data. Select the “Add lists, libraries, and other apps” button.
Select the Custom List button.

Select the name for your list (this can be changed later). I decided to create a list of Simpsons Characters, but of course your list can focus on something more productive.

Your list will be created, but will remain empty until you put some data into it. Go ahead and select your list from the Contents section of your site.

Your (currently empty) list should appear. Click the Gear Icon in the top right corner, and then select List settings. Now you’ll be able to edit the various column types for your list, as well as other customizable features.

Title, Modified Date, Created Date, Created By, and Modified By are all automatically created fields that you can adjust the names/settings for. Simple click on the column name and easily alter the settings.

I aptly chose to change the “Title” column to “Character Name.”

To create additional columns for your list (each column is essentially a question in your form), select “Create column.”

For example, one column I chose to create was a “Relationship to Homer” column. As you can see there are many different information types you can choose from for each of your columns; for this one I chose to do multiple choice radio buttons for each relationship type.

Once you have finished creating the columns for your list, be sure to go to List Settings, then Advanced Settings, and make sure you select “Yes” to “Allow management of content types.” This is important for when you use lists to fill in document templates.

Now that all of your columns are set up, it’s time to fill up your list. On your list’s main page, click the “New” button, and the following form (but with your column types) will pop up:

As you can see, you can even create columns with mixed medias (in this case, images). Below you can see my filled out list, with columns for Character Name, Age, Relationship to Homer, and Picture. Once you are happy with your list, you can then easily export and apply it

As you can see, the list easily exports into an Excel version of itself, which you can then use for whatever analysis or data presentation you so choose. The images I included in my list ended up reverting to the alternate text, but numbers, text, and multiple choices export in a format that can be easily sorted, filtered, and analyzed.

Now you can make your very own database of Simpsons characters (or perhaps something a bit more work related…) with SharePoint Lists and Forms. Good luck!
Get your FREE SharePoint Intranet
![]()